Setting up a Proxy on MAC
How to set up a Proxy on the MAC
Unfortunately I do not have a MAC to show you how to set up the proxy for the MAC, but below is a detailed description from one of my users and their video demonstration.
Recently I set up the proxy for a friend of mine on her MAC and I managed to do in 5 mins, as a result I recommend you install FireFox and use the quickproxy plugin (You can see details on this at the bottom of this post) as the quickest and simplest way.
The video below has no sound but at the very least it should give you a few clues too:
Also if you have FireFox as your browser, then I believe the instruction on how to set up the proxy in Firefox here should also work, but setting the proxy in the OS of the computer enables live streaming of programmes.
For Apple OS and Internet Explorer
Click on the System Preferences icon (in your System Tray or in your Applications folder).
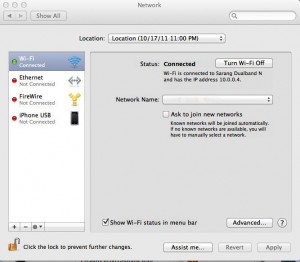
Click on the Network icon in the Internet & Wireless section.
Select the Internet connection type to be modified from the list on the left of the Network window.
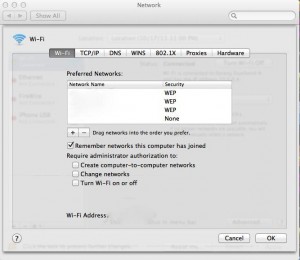
Click on the Advanced button (lower right of Network window). A new window will open.
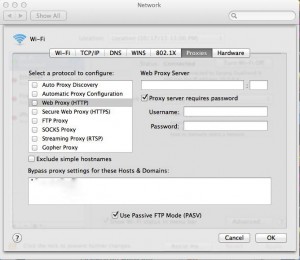
Click on the Proxies button (in row across top of window)
Click the checkbox for Web Proxy (HTTP) and enter the appropriate Web Proxy Server and Port information
Repeat for Secure Web Proxy (HTTPS), FTP Proxy, and SOCKS Proxy. Note different Port number for SOCKS Proxy.
Click the OK button. The window will close.
Click the Apply button (bottom right of window).
Internet Explorer will prompt for a username and password. You can choose to have the OS remember this if you wish.
Once connected to BBC iPlayer you can go back into Network Preferences within the System Preferences app and deselect the checkboxes for the four Proxy protocols above. This should result in faster streaming of the BBC iPlayer content.
For Apple OS and Firefox
Setting up a proxy in Firefox is, to me, easier because you can do it from within the browser.
Open Firefox.
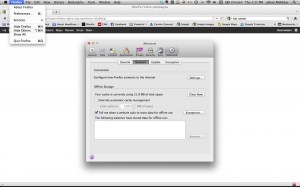
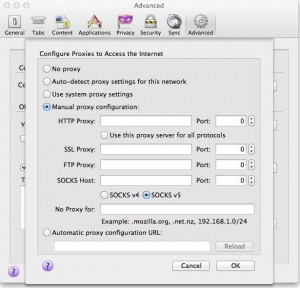
Click Firefox (top left of menu bar) and select Preferences … from the dropdown menu.
Click the Network button.
Click the Settings button. This will open a new window.
Click the Manual proxy configuration radio button
Enter the appropriate Web Proxy Server and Port information for Web Proxy (HTTP), Secure Web Proxy (HTTPS), FTP Proxy, and SOCKS Proxy in the respective boxes. Note different Port number for SOCKS Proxy.
Click the OK button (bottom right of window). This will close the Configure Proxies window.
Close the Firefox Preferences window (click on the red button in the top left of the window).
Firefox will prompt for a username and password. You can choose to have the OS remember this if you wish.
Once connected to BBC iPlayer you can go back into Firefox preferences and turn off the proxy by clicking on the No proxy radio button. This should result in faster streaming of the BBC iPlayer content.
A more elegant way to do this is to install the QuickProxy Add-on in Firefox.
Install QuickProxy in Firefox
In Firefox go to https://addons.mozilla.org/en-US/firefox/addon/quickproxy/
Download QuickProxy
Firefox will prompt you to restart the browser to complete the installation of QuickProxy.
Once Firefox has restarted configure QuickProxy by clicking on the Tools button (toward the right end of the menu bar) and selecting Add-ons from the dropdown menu.
In the Add-ons Manager window select Extensions (left side of window).
You should see QuickProxy listed.
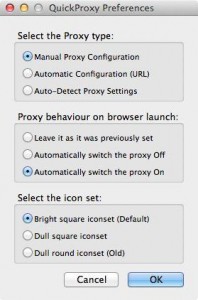
Click the Preferences button. This will open the QuickProxy Preferences window.
Click the Manual Proxy Configuration radio button.
Set your preferences for how you want the proxy to behave on browser launch and the type of icon you want for QuickProxy.
Click the OK button. This will close the QuickProxy Preferences window.
You should see your chosen QuickProxy icon in the lower right corner of your Firefox window (see Ad-ons Manager screenshot above). If you do not see the QuickProxy icon:
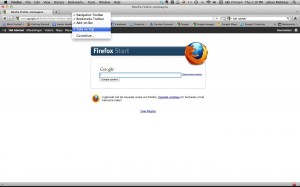
Control-Click immediately to the right of the + tab in the Tab bar. In the dropdown menu select Add-on Bar (a check mark shows that this has been selected).
Your Quickproxy icon should now be visible in the bottom right corner of your browser window.
Click on the QuickProxy icon to change the state of your browser proxy. A green icon means that your manual proxy settings are on. A red icon means that you are using your default proxy settings.


